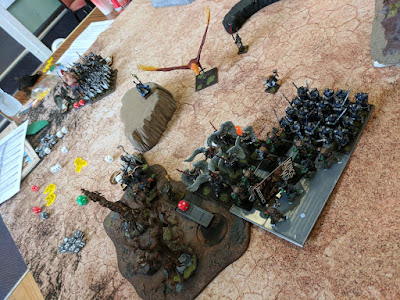
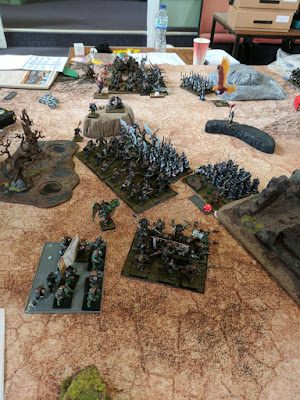
Game 3 : Paul (Elves) versus Twilight Kin (James), 2000 points, Scour
 |
| Bitter and Twisted |
Introduction
Elves versus nasty Elves. This was our third and last battle of the day, and one I could sit back, enjoy and watch the action - pausing the game constantly to take pictures. A benefit of this was I was able to record more info about the wounds dealt to each unit. Gratitude to both players for their patience.
This was their fourth clash. Paul's and James' armies had fought before with one draw result and James' Twilight Kin being victorious twice.
Both armies were identical to those fielded in battles 1 and 2.
Paul's Elven Army
Seaguard Horde, Wine of Elvenkind - 320
Drakon Horde, Brew of Strength - 300
2 Palace Guard Regiments, one with War-bow of Kaba - 305
War Chariots Regiment, Piercing Arrow - 150
Stormwind Cavalry Regiment, Maccwar's Potion of Caterpillar - 235
2 Bolt Throwers - 180
2 Princes on Horses, Mace of Crushing, Kaba's Holy Hand Grenades - 180
2 ASBs on Horses, Diadem of Dragon-king, The Boomstick -190
2 ASBs, Lute of Insatiable Darkness, Banner of the Griffin - 140
James' Twilight Kin Army
Spearmen Horde, Hammer of Measured Force - 250
2 Reaper Guards Regiments, Brew of Courage, Orcsbain's Amulet of Thorns - 350
Dark Knights Regiment, Maccwar's Potion of the Caterpillar - 230
Crossbowmen Regiment, Fire-Oil - 155
2 Twilight Bolt Throwers - 180
ASB on Horse, Banner of the Griffin - 85
Dark Lord on Black Dragon, The Fog - 345
Archfiend of the Abyss, Lightning Bolt (5), Healing Brew - 280
High Priestess of the Abyss, Bane-chant (2), Soul Drain, Myrddin's Amulet of the Fire-heart - 125
Scenario & Terrain
 |
| Terrain and Objective Markers |
The scenario rolled was Scour (again!) with 7 objective tokens.
Deployment
 |
| Deployment - the beautiful vs. the cruel |
 |
| Elven Deployment |
 |
| Twilight Kin Deployment |
Paul (Elves) had the first move.
Turn 1 Elves
 |
| Turn 1 Elves - forward! |
 |
| War Chariots drawing blood |
Turn 1 Twilight Kin
 |
| Turn 1 Twilight Kin |
The Twilight Kin do some damage, but it's a disappointing round of shooting for James.
Turn 2 Elves
 |
| Turn 2 Elves |
 |
| Key |
The Elven arrows and spells inflict a devastating 18 points of damage, wounding many Twilight Kin
units and killing one of the Reaper Guards Regiments. James' Twilight Kin Bolt Throwers are charged and eliminated in melee. The event of the turn was the High Priestess of they Abyss dying from one lucky Diadem of Dragon-king fireball.
It is a bleak hour for the Twilight Kin, losing so much while the battle is in it's infancy.
 |
| The Immolation of the High Priestess |
Turn 2 Twilight Kin
 |
| Turn 2 Twilight Kin |
The ASB on Horse and War Chariots are wavered by Twilight Kin ranged fire. The Twilight Kin right wing closes the gap between themselves and the Elves.
Turn 3 Elves
 |
| Turn 3 Elves |
The Twilight Kin are wracked by brutal ranged fire. The Crossbowmen rout. The Reaper Guard are wavered by the charge of Elven Stormwind Cavalry.

Turn 3 Twilight Kin
 |
| Turn 3 Twilight Kin |
Revenge, the Stormwind Cavalry Regiment and one of the Princes are slain. The Drakon are wavered.

Turn 4 Elves
 |
| Turn 4 Elves |
Dark Knights wavered by shooting. The crippled Reaper Guard are finished off by shooting.
Turn 4 Twilight Kin
 |
| Turn 4 Twilight Kin |
James manoeuvres his army to eliminate the Drakon and Seaguard, abandoning his lost left flank.
Turn 5 Elves
 |
| Turn 5 Elves |
The Dark Knights are wavered by mass shooting. The Dark Dragon is wounded, and the Twilight Spearmen Horde are massacred.
Turn 5 Twilight Kin
 |
| Turn 5 Twilight Kin |
The Black Dragon overruns the Drakon!
Turn 6 Elves
 |
| Turn 6 Elves |
The constantly wavered Dark Knights finally die. James also loses his mounted ASB.
Turn 6 Twilight Kin
 |
| Turn 6 Twilight Kin & END |
The Archfiend of the Abyss puts down some hurt on the Seaguard, wavering them. The Black Dragon's lightning inflicts one point of damage to the nearest Palace Guard. But it's not enough and too late.
 |
| The Twilight Kin's final actions. |
 |
| Victory for the Elves! |
The battle ends. Paul wins, having 3 objectives to James 1. A comprehensive Elven Victory!
After the Battle
It surprised me how quickly the battle was played out. Both armies had a fair amount of ranged attacks, with James' Twilight Kin having a small edge. Paul's aggressive play, James' acknowledged mistakes and the vagaries of dice, meant that many Twilight Kin ranged units were eliminated before they could do much - particularly the two Bolt Throwers, the High Priestess and to some extent the Crossbowmen.
Paul mentioned he needed to find of a way of keeping his drakons from taking damage early on (they were unable to do anything during the first four turns). In the future he would try to find a way to kill the arch-fiend sooner, and reduce James' ranged attacks.
James acknowledged that his deployment wasn't great, and that he should of stuck to his plan with his Black Dragon and Dark Knights fighting for their flank, then things could of worked out better (instead they tried to help the other flank, resulting in the Dark Knights being permanently wavered and eventually killed).
Thanks a lot for reading!


